
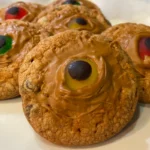
Eyeball chocolate chip cookies are the perfect mix of spooky and sweet, ideal for Halloween parties, themed birthdays, or just a fun baking project with the kids.
These cookies take the classic chocolate chip favorite and give it a creepy twist by adding candy eyeballs on top, turning a simple treat into something delightfully eerie.
Soft, chewy, and loaded with melty chocolate chips, they’re as tasty as they are entertaining to look at.
Looking to impress guests or just add some frightful fun to your dessert tray, these cookies deliver both flavor and flair.
Best of all, they’re easy to make and fun to decorate, so you can get creative with every batch. Get ready for a deliciously creepy cookie that’s sure to be the talk of your spooky celebration!
Why You Will Choose Eyeball Chocolate Chip Cookies?
You’ll choose eyeball chocolate chip cookies because they combine the perfect balance of delicious, gooey chocolate chips with a fun, spooky twist.
Easy to make and highly customizable, they add an element of surprise to any event. Whether for Halloween or a themed party, these cookies are sure to impress and delight!
How To Prepare Eyeball Chocolate Chip Cookies?
Preparation Time: 15 minutes
Cooking Time: 12 minutes
Total Time: 27 minutes
Course: Dessert
Cuisine: American
Yield: 24 cookies

Equipment Needed
- Mixing Bowls
- Hand Or Stand Mixer
- Measuring Cups And Spoons
- Baking Sheets
- Parchment Paper
- Cooling Racks
- Microwave-Safe Bowl (For Melting Chocolate)
- Spoon Or Small Spatula (For Spreading Chocolate)
Ingredients
- 2 sticks (1 cup) unsalted butter, softened
- 3/4 cup granulated sugar
- 3/4 cup packed light brown sugar
- 2 large eggs
- 1 teaspoon pure vanilla extract
- 2 1/2 cups all-purpose flour
- 1 teaspoon baking soda
- 1/2 teaspoon salt
- 1 1/2 cups mini chocolate chips
- 1 cup white candy melts or white chocolate chips
- 24 candy eyeballs (available at most baking supply stores)
Instructions
1. Preheat and Prep
Preheat your oven to 350°F (175°C). Line your baking sheets with parchment paper to prevent sticking and ensure even baking.
2. Cream the Butter and Sugars
In a large mixing bowl, beat together the softened butter, granulated sugar, and brown sugar until the mixture is light and fluffy. This process incorporates air into the dough, leading to a lighter cookie texture.
3. Add Eggs and Vanilla
Add the eggs one at a time, beating well after each addition. Stir in the vanilla extract. The eggs provide structure and moisture, while the vanilla adds a depth of flavor.
4. Combine Dry Ingredients
In a separate bowl, whisk together the all-purpose flour, baking soda, and salt. Gradually add this dry mixture to the wet ingredients, mixing until just combined. Be careful not to overmix, as this can lead to tough cookies.
5. Fold in Chocolate Chips
Gently fold in the mini chocolate chips, ensuring they’re evenly distributed throughout the dough.
6. Scoop and Shape
Using a cookie scoop or tablespoon, drop rounded balls of dough onto the prepared baking sheets, spacing them about 2 inches apart. Flatten each ball slightly with the back of a spoon.
7. Bake
Bake in the preheated oven for 12 minutes, or until the edges are golden brown. The centers may appear slightly soft, but they’ll firm up as the cookies cool.
8. Cool
Allow the cookies to cool on the baking sheets for a few minutes before transferring them to wire racks to cool completely.
9. Decorate
While the cookies are cooling, melt the white candy melts or white chocolate chips in a microwave-safe bowl, stirring every 30 seconds until smooth. Once the cookies have cooled, spoon a small amount of the melted white chocolate onto the center of each cookie to create the “white” of the eyeball.
Press a candy eyeball into the center of the white chocolate. If desired, use a toothpick dipped in red food coloring to draw bloodshot lines around the eyeball for added effect.
Special Note
For a fun twist, feel free to get creative with your “eyeball” toppings! You can use candy eyes, or even substitute with M&Ms or white chocolate chips for a different look.
These cookies are perfect for customizing, making them a spooky, personalized treat for any occasion!
Nutrition Facts
Calories: 150
Fat: 8g
Saturated Fat: 5g
Cholesterol: 30mg
Sodium: 90mg
Carbohydrates: 20g
Fiber: 1g
Sugars: 15g
Protein: 2g
Serving Ideas
Eyeball chocolate chip cookies make a fun addition to any spooky spread! Serve them on a themed platter with other Halloween treats, or pair them with a glass of milk for a classic touch.
They also make great party favors, packaged in clear bags with festive ribbons for a creative treat gift!
Hints And Tips For Successful Cookie Baking
Here are three key hints and tips for successful eyeball chocolate chip cookies:
1. Chill the Dough:
Refrigerate the dough for 30 minutes before baking to prevent spreading and achieve a thicker, chewier texture.
2. Press the Eyeballs Gently:
Place the candy eyeballs on top of the cookies right before baking, pressing them lightly into the dough to ensure they stay in place.
3. Monitor Bake Time:
Keep an eye on your cookies and remove them once the edges are golden, but the centers are still soft for the perfect texture.
Storage & Make Ahead
To keep your eyeball chocolate chip cookies fresh, store them in an airtight container at room temperature for up to a week.
If you want to make them ahead, you can prepare the dough and refrigerate it for up to 3 days or freeze it for longer storage. Simply bake when ready!
Conclusion
Eyeball chocolate chip cookies are a spooky-sweet treat that brings fun, flavor, and just the right amount of fright to any festive occasion.
Baking for a Halloween bash, a themed school party, or just a fun night in, these cookies are sure to grab attention and satisfy sweet cravings.
With their gooey chocolate chips and creepy candy eyes, they’re a playful way to celebrate the season.
So gather your ingredients, get creative with the decorating, and enjoy every deliciously eerie bite!
Eyeball Chocolate Chip Cookies
Equipment
- Mixing bowls
- Hand or stand mixer
- Measuring cups and spoons
- Baking sheets
- Parchment paper
- Cooling racks
- Microwave-Safe Bowl (For Melting Chocolate)
- Spoon Or Small Spatula (For Spreading Chocolate)
Ingredients
- 2 sticks 1 cup unsalted butter, softened
- 3/4 cup granulated sugar
- 3/4 cup packed light brown sugar
- 2 large eggs
- 1 teaspoon pure vanilla extract
- 2 1/2 cups all-purpose flour
- 1 teaspoon baking soda
- 1/2 teaspoon salt
- 1 1/2 cups mini chocolate chips
- 1 cup white candy melts or white chocolate chips
- 24 candy eyeballs available at most baking supply stores
Instructions
Preheat and Prep
- Preheat your oven to 350°F (175°C). Line your baking sheets with parchment paper to prevent sticking and ensure even baking.
Cream the Butter and Sugars
- In a large mixing bowl, beat together the softened butter, granulated sugar, and brown sugar until the mixture is light and fluffy. This process incorporates air into the dough, leading to a lighter cookie texture.
Add Eggs and Vanilla
- Add the eggs one at a time, beating well after each addition. Stir in the vanilla extract. The eggs provide structure and moisture, while the vanilla adds a depth of flavor.
Combine Dry Ingredients
- In a separate bowl, whisk together the all-purpose flour, baking soda, and salt. Gradually add this dry mixture to the wet ingredients, mixing until just combined. Be careful not to overmix, as this can lead to tough cookies.
Fold in Chocolate Chips
- Gently fold in the mini chocolate chips, ensuring they’re evenly distributed throughout the dough.
Scoop and Shape
- Using a cookie scoop or tablespoon, drop rounded balls of dough onto the prepared baking sheets, spacing them about 2 inches apart. Flatten each ball slightly with the back of a spoon.
Bake
- Bake in the preheated oven for 12 minutes, or until the edges are golden brown. The centers may appear slightly soft, but they’ll firm up as the cookies cool.
Cool
- Allow the cookies to cool on the baking sheets for a few minutes before transferring them to wire racks to cool completely.
Decorate
- While the cookies are cooling, melt the white candy melts or white chocolate chips in a microwave-safe bowl, stirring every 30 seconds until smooth. Once the cookies have cooled, spoon a small amount of the melted white chocolate onto the center of each cookie to create the “white” of the eyeball.
- Press a candy eyeball into the center of the white chocolate. If desired, use a toothpick dipped in red food coloring to draw bloodshot lines around the eyeball for added effect.